Whether you’re working with a sprawling backyard or a modest balcony, the art of gardening at home can transform both your space and your lifestyle.
With this guide, we dive into 67 inventive gardening tips, tricks, and hacks designed to make your gardening journey more fruitful, and enjoyable.
From turning everyday waste into garden gold to clever pest control methods that keep your plants healthy without harsh chemicals, these hacks are tailored for gardeners of all levels. Gardening at home doesn’t have to be an expensive or complicated endeavor.
With a little creativity and resourcefulness, you can transform your garden into a lush, productive space.
Here’s a list of 67 gardening tips, tricks, and hacks that can help you do just that:
1. Compost Everything:
Composting is one of the most environmentally friendly things you can do for your garden. It involves taking organic waste like vegetable scraps, coffee grounds, and yard clippings and turning them into a nutrient-rich soil amendment. Start with a compost bin or simply designate a corner of your garden for this purpose. The key is to maintain a balance between “green” materials (which provide nitrogen, like kitchen scraps) and “brown” materials (which provide carbon, like dry leaves or straw). Regularly turning the pile ensures oxygen reaches the microorganisms that break down the materials.
The benefits of compost include improved soil structure, increased moisture retention, and a slow-release source of nutrients for your plants. It’s also an excellent way to reduce your household waste, contributing to a more sustainable lifestyle. Remember, while you can compost many kitchen items, avoid adding meat, dairy, or diseased plant material to prevent attracting pests or spreading diseases.
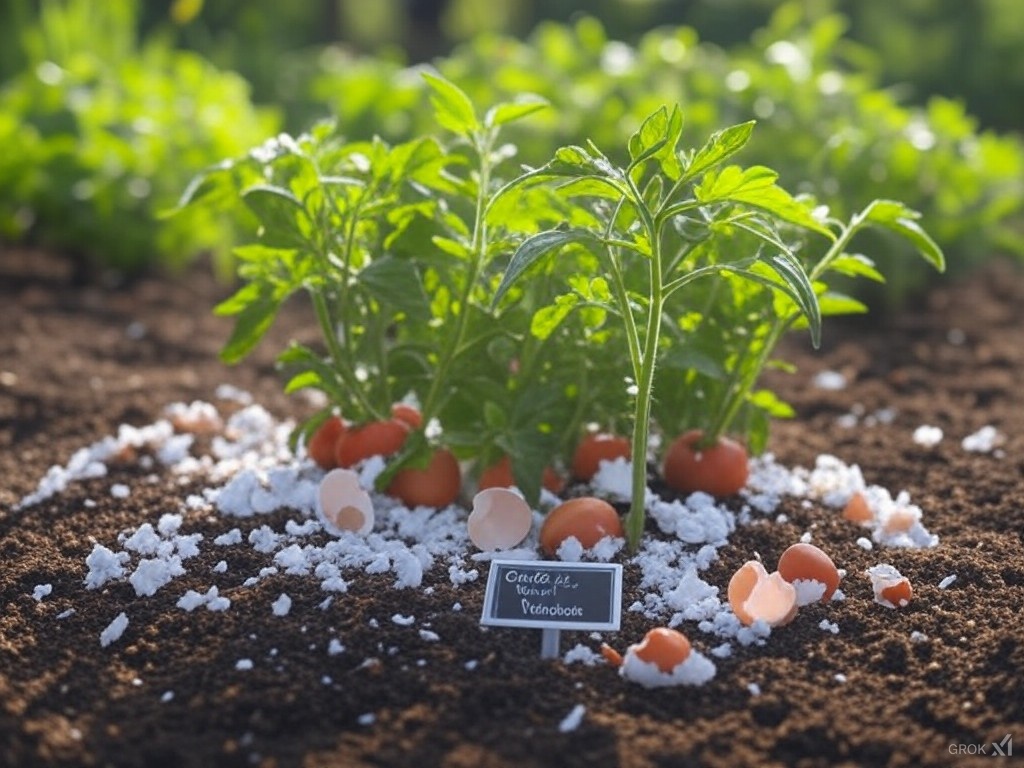
2. Eggshell Calcium:
Eggshells are not just for breakfast; they’re a treasure trove of calcium carbonate, essential for plant health, particularly in preventing issues like blossom end rot in tomatoes. Rinse your eggshells to remove any egg residue, then dry them. Once dried, you can crush them into small pieces or even grind them into a powder using a blender or mortar and pestle. Sprinkle this around your plants or mix into the soil before planting.
Calcium from eggshells helps to strengthen cell walls in plants, which is crucial for water and nutrient uptake. This hack not only recycles what would otherwise be waste but also contributes to more robust plant growth. Keep in mind, though, that eggshells decompose slowly, so while they provide long-term benefits, you might need to supplement with quicker-release calcium sources for immediate plant needs.
3. Coffee Grounds Fertilizer:
Coffee grounds are a fantastic addition to any garden, particularly for those plants that thrive in slightly acidic soil. They’re rich in nitrogen, which is vital for leaf growth, but also contain trace amounts of other nutrients like phosphorus and potassium. You can either sprinkle used coffee grounds directly around your plants or incorporate them into your compost pile. If using directly, ensure they’re well mixed into the soil to avoid creating a too-acidic environment around plant roots.
Beyond their nutrient content, coffee grounds can also improve soil structure by promoting beneficial microbial activity. They help with water retention and can deter certain pests like slugs and snails due to their abrasive texture. However, moderation is key; too much can lead to an imbalance in soil pH, so use coffee grounds as part of a diverse soil amendment strategy.
4. Banana Peel Fertilizer:
Bananas are not just for eating; their peels are packed with potassium, which is crucial for plant health, especially when it comes to flowering and fruiting. Chop or blend the peels and bury them near the roots of your plants. Over time, as they decompose, they’ll release potassium into the soil. This method is particularly beneficial for plants like roses, tomatoes, and peppers which require a good amount of potassium to produce blooms and fruits.
Besides potassium, banana peels also contain small amounts of phosphorus, calcium, magnesium, and other trace minerals. By recycling your peels in this way, you’re not only feeding your plants but also reducing landfill waste. If you’re concerned about attracting pests, you can dry the peels first or ensure they’re well covered with soil. This hack is a testament to how everyday kitchen waste can be transformed into a garden’s treasure.
5. Epsom Salt for Magnesium:
Epsom salt, or magnesium sulfate, is a simple and cost-effective way to give your plants a magnesium boost. Magnesium plays a vital role in photosynthesis, helping plants to produce chlorophyll, which is essential for their green color and health. To use, dissolve 1 tablespoon of Epsom salts in a gallon of water and use this to water your plants once a month during the growing season. This is particularly useful for plants showing signs of magnesium deficiency, like yellowing between leaf veins.
Epsom salt also provides sulfur, another vital nutrient for plant health. However, it’s important to use it judiciously. Overuse can lead to an imbalance in soil nutrients, potentially causing nutrient lockout where plants can’t absorb other necessary elements. Always observe your plants’ reactions and adjust your usage accordingly. This hack is especially beneficial in areas where soil naturally lacks magnesium or after a lot of rain has leached nutrients from the soil.
6. Cinnamon as Fungicide:
Cinnamon isn’t just for baking; it has natural antifungal properties which can be a boon in the garden. When you sprinkle cinnamon on the soil’s surface around your plants, it can prevent fungal infections like damping off in seedlings. Damping off is a common problem where young plants wilt and die due to fungal growth at the soil line. By creating a barrier with cinnamon, you’re providing a natural solution that’s both safe and effective for your young plants.
This spice can also be used on cut stems when propagating plants, helping to seal the wound and prevent rot. It’s an eco-friendly alternative to chemical fungicides, reducing the environmental impact while still protecting your garden. However, remember that cinnamon should be used in moderation; it’s not a cure-all but rather a preventive measure when used alongside good gardening practices like proper watering and air circulation.
7. Yogurt for Soil Health:
Yogurt might seem like an odd addition to your garden, but its live cultures can be beneficial for soil health. The beneficial bacteria in yogurt help to break down organic materials in the soil, improving its structure and aiding in nutrient uptake by the plants. You can mix a small amount of plain yogurt into the soil or water it down and use it as a foliar spray. This introduces probiotics to your garden’s ecosystem, fostering a healthy balance of microorganisms.
While yogurt should not be your sole source of soil amendments, it can complement compost and other organic matter. It’s particularly useful in newly established gardens where the soil biology might still be developing. The lactic acid in yogurt can also slightly acidify the soil, which is beneficial for certain plants. However, use it sparingly to avoid over-acidifying the soil, and always ensure it’s mixed well into the soil to prevent attracting pests.
8. Milk for Calcium:
Milk is not only good for human bones but can also provide calcium to plants. Dilute milk with water in a ratio of about 1 part milk to 4 parts water and use it as a foliar spray or soil drench. This method can help prevent calcium deficiency diseases like blossom end rot in tomatoes and peppers. The proteins and sugars in milk can also act as a natural fungicide, helping to control powdery mildew on plant leaves.
It’s essential to use this hack judiciously, as too much milk can lead to soil imbalances or attract pests like ants and flies. The frequency of application should be limited to once every few weeks, and it’s advisable to do a small test spray before treating the whole garden to ensure your plants react well. This method combines nutrient supplementation with pest and disease control, making it a multifaceted gardening tip.
9. Diatomaceous Earth:
Diatomaceous Earth (DE) is a natural, powdery substance made from the fossilized remains of diatoms, a type of hard-shelled algae. It’s lethal to many garden pests like slugs, snails, aphids, and even some beetle larvae because it’s abrasive to their exoskeletons, causing them to dehydrate. Sprinkle DE around the base of plants or where pests congregate, but do so when it’s not windy to avoid losing the product.
When using DE, it’s crucial to wear a mask, as inhaling the fine powder can be harmful to human lungs. Also, keep in mind that DE only works as long as it remains dry; once wet, it loses its effectiveness until it dries out again. It’s an organic solution for pest control that doesn’t harm beneficial insects like bees when used correctly. However, reapplication might be needed after rain or heavy watering.
10. Aspirin for Plant Health:
Aspirin contains salicylic acid, which can help boost a plant’s immune system. By dissolving an aspirin tablet in a gallon of water (use uncoated, plain aspirin to avoid introducing unnecessary chemicals), you create a solution that can be used as a spray on plants to help them fight off diseases. This treatment can enhance the plant’s natural defenses, making it more resistant to fungal attacks and stress from environmental factors.
This hack isn’t about curing diseases but rather about prevention and strengthening plant resilience. It’s especially useful before conditions like high humidity or temperature changes that might stress plants or encourage disease. Like with all treatments, moderation is key; overuse can stress plants or alter soil pH. This method is a testament to how common household items can serve unexpected roles in gardening, promoting health without synthetic chemicals.
11. Garlic Spray:
Garlic has natural insecticidal properties, particularly effective against aphids, spider mites, and even some fungal issues. To make garlic spray, blend a few cloves of garlic with water, let it steep for a day or two, strain out the solids, and use the liquid in a spray bottle. You can dilute it further with water to avoid burning plant leaves. Spraying this mixture on your plants can act as both a deterrent and a treatment for pest infestations.
The sulfur compounds in garlic are what make it effective against pests, but they’re also what can make it potentially harmful to beneficial insects if not used carefully. It’s best to apply garlic spray in the early morning or late evening when beneficial insects are less active. Regular application might be needed, especially after rain or watering. This method is particularly valuable for organic gardeners looking for natural pest control options.
12. Soap for Ants:
Ants can be a nuisance in the garden, but a simple soapy water solution can help manage them without harsh chemicals. Mix a few drops of dish soap into a spray bottle filled with water. This mixture can be directly applied to ant trails, nests, or even sprayed on plants where ants are farming aphids. The soap disrupts the ant’s exoskeleton and can suffocate them, while also deterring them from returning due to the residue left behind.
Be cautious with this method as soap can also affect beneficial insects or harm plants if used in excess. It’s best used as a spot treatment rather than a blanket spray across your entire garden. Ensure to test on a small area of the plant first to check for any adverse reactions. This hack is ideal for quick, immediate control of ant issues without resorting to chemical pesticides, promoting a more balanced garden ecosystem.
13. Neem Oil:
Neem oil is derived from the seeds of the neem tree and serves multiple purposes in the garden. It acts as an insecticide, fungicide, and miticide, effective against a wide range of pests including aphids, whiteflies, and spider mites, while also combating fungal diseases like powdery mildew. To use, mix neem oil with water according to the product instructions, usually with a mild soap to help it adhere to plant surfaces.
Neem oil works by disrupting the life cycle of pests, preventing them from feeding or reproducing. It’s one of the safest options for organic gardening, as it breaks down in sunlight and doesn’t accumulate in the environment. However, application should be done in the cooler parts of the day to prevent leaf burn, and regular treatments might be required to manage ongoing pest problems. Always follow label instructions for dilution and application frequency to avoid overuse.
14. Peppermint Oil:
Peppermint oil is a natural repellent for various garden pests, including rodents, ants, aphids, and mosquitoes. Dilute a few drops of the essential oil in water, shake well, and spray around the garden, particularly on entry points, around plant bases, or where pests are commonly seen. The strong scent acts as a deterrent without being harmful to most plants when used in moderation.
While peppermint oil can be an effective part of your pest management strategy, it’s volatile and needs reapplication after rain or every few days in calm weather. It’s crucial to use it sparingly because, like all essential oils, it can be phytotoxic if applied in high concentrations. This hack is especially useful for those looking to repel pests without impacting beneficial insects significantly, as the scent dissipates, leaving no long-term residue.
15. Baking Soda for Mildew:
Baking soda can combat fungal diseases like powdery mildew, which can quickly spoil the look and health of your plants. Create a spray by mixing 1 tablespoon of baking soda, 1/2 teaspoon of liquid soap (to help it stick), and a gallon of water. Spray this on the leaves where mildew appears, ensuring coverage on both sides of the leaves where the fungus often starts.
This mixture raises the pH on the leaf surface, creating an environment where mildew fungi struggle to grow. Use this solution preventatively or at the first sign of mildew, and reapply weekly or after rain. However, it’s not a cure for severe infections; it’s more effective for early control. Also, be cautious not to overuse as it can alter soil pH if too much drips down to the roots over time. This hack is a simple, eco-friendly way to maintain plant health, especially in conditions prone to fungal growth.
16. Companion Planting:
Companion planting involves strategically placing certain plants near each other to benefit from mutual growth advantages, pest control, or improved flavor. For instance, planting basil alongside tomatoes can enhance the flavor of tomatoes and repel pests like whiteflies. Marigolds near vegetable plants can deter nematodes from attacking the roots, while nasturtiums can keep aphids at bay when planted near brassicas.
The science behind companion planting lies in allelopathy, where plants release chemicals that can inhibit or promote the growth of neighboring plants. It’s also about attracting beneficial insects like pollinators or predators of garden pests. However, the effectiveness can vary based on local conditions, soil types, and specific plant varieties. Experimentation and observation over time will help you tailor this practice to your garden’s unique ecosystem.
17. Marigolds for Pest Control:
Marigolds are not just beautiful; they’re also workhorses in pest management. They emit a substance from their roots that repels nematodes, microscopic worms that can damage plant roots. Planting marigolds around your garden, especially near susceptible plants like tomatoes or peppers, can significantly reduce nematode populations.
Beyond nematodes, marigolds can attract beneficial insects like ladybugs and hoverflies, which feed on aphids and other pests. Their bright colors can also serve as a trap crop, drawing pests away from your main crops. However, ensure you choose varieties like French or African marigolds for maximum pest control benefits. Remember, their efficacy might be area-specific, so local gardening communities can be a great resource for advice.
18. Vertical Gardening:
Vertical gardening maximizes space, allowing you to grow more in less area by using walls, trellises, or other upward structures. This is perfect for vining plants like beans, cucumbers, or even flowers like morning glories, which can grow upwards rather than sprawling across the ground. It improves air circulation around plants, reducing disease risk, and can make harvesting easier.
Setting up vertical structures can be as simple as using stakes for tomatoes or as complex as creating a living wall. Ensure the supports are sturdy, as they’ll need to bear the weight of mature plants. Consider the sunlight; vertical gardens can cast shadows, so plan your layout to make sure all plants get adequate light. This method not only saves space but also adds an aesthetic, three-dimensional element to your garden.
19. Hanging Herb Garden:
Herbs are perfect candidates for hanging gardens due to their generally small size and light requirements. By suspending pots or baskets from hooks or a ceiling, you can utilize vertical space, keep herbs within easy reach for cooking, and prevent ground-dwelling pests from attacking them. Herbs like basil, mint, thyme, and oregano thrive in this environment, often needing less soil than traditional planting.
Ensure your hanging garden gets enough light, as most herbs require full sun. Watering can be tricky; hanging baskets dry out faster, so you might need to check and water more frequently. Also, consider the weight; saturated soil in multiple pots can become heavy, so secure your hanging system well. This hack is particularly useful for urban gardeners or those with limited ground space.
20. Self-Watering Containers:
Self-watering containers are a boon for busy gardeners or those who might forget to water regularly. These systems generally involve a reservoir at the bottom with a wick or capillary action to draw water up into the soil. You can DIY one by using a plastic bottle with holes at the bottom as a reservoir, connected via a wick (like a piece of rope) to the soil.
This setup reduces the frequency of watering and helps maintain consistent soil moisture, crucial for plant health. It’s particularly beneficial in hot climates or for plants that don’t tolerate dry conditions well. When setting up, ensure the reservoir isn’t too large for the plant’s needs to avoid root rot from excess moisture. Regular checks are still necessary to refill the reservoir and adjust as plant growth demands change.
21. Succession Planting:
Succession planting is the practice of sowing seeds at staggered intervals to extend the harvest period of crops. Instead of planting all your seeds at once, you sow small amounts every few weeks. This is particularly effective for quick-maturing vegetables like lettuce, radishes, or spinach, ensuring you have a continuous supply rather than a single large harvest.
22. Interplanting:
Interplanting or intercropping involves growing two or more crops in proximity to each other to benefit from their mutual growth habits or pest control properties. For example, you could plant radishes between rows of slower-growing carrots; the radishes will be harvested before the carrots need the space, and they help to break up the soil for the carrots. Another example is using lettuce as a ground cover between taller plants like tomatoes, which shades the soil, conserving moisture and reducing weed growth.
The key to successful interplanting is understanding the growth patterns, nutrient needs, and pest profiles of the plants you’re pairing. Some combinations can be synergistic, where one plant enriches the soil for the other or repels pests. However, competition for nutrients or space can occur if not planned correctly. Interplanting can lead to a more diverse and resilient garden ecosystem, promoting biodiversity and potentially reducing pest pressure.
23. Rotate Crops:
Crop rotation is the practice of changing what you plant in a particular area each year to prevent soil depletion, reduce pest and disease buildup, and improve soil fertility. A simple rotation might involve moving your tomatoes to where beans grew last year, and vice versa, since beans add nitrogen to the soil, which tomatoes love.
Planning a rotation involves understanding plant families and their common diseases or nutrient needs. For example, avoid planting successive crops from the same family in the same spot due to shared diseases. A four-year rotation cycle is often recommended, but even a two-year switch can be beneficial. This practice not only helps in managing soil health but also in breaking pest life cycles, contributing to a more sustainable gardening approach.
24. Soda Bottle Watering:
Creating a drip irrigation system from old soda bottles is a simple yet effective way to water plants slowly and efficiently. Poke small holes in the bottom of a bottle, fill it with water, cap it, and then invert it into the soil near your plants. The water will slowly seep out, providing hydration directly to the roots where it’s most needed.
This method is particularly useful for container gardening or in areas where water conservation is a concern. It helps prevent over-watering, which can lead to root rot, and ensures water is used where it’s most effective. Remember to refill the bottles as needed, and consider the size of your plants when determining how many holes to make; larger plants might need more water flow.
25. Use Rain Barrels:
Collecting rainwater in barrels is an eco-friendly way to water your garden, saving on your water bill and providing plants with mineral-rich, chemical-free water. Set up a rain barrel under a downspout to catch runoff from your roof. Ensure it’s covered to prevent mosquito breeding and debris from entering.
Rainwater is slightly acidic, which many plants prefer, and it doesn’t contain the chlorine or fluoride found in tap water. Using a rain barrel also helps manage stormwater runoff, reducing the risk of local flooding. However, you’ll need to manage the system, cleaning it periodically and ensuring it’s not overflowing during heavy rains. If you garden in an area with significant rainfall, this can be a substantial resource, but even in drier climates, every drop counts.
26. Drip Irrigation from Old Pipes:
Repurposing old PVC pipes or even garden hoses into a drip irrigation system can save water and time. Drill small holes along the length of the pipe where you want water to drip out near your plants. Connect this pipe to your water source, and you have a system that delivers water directly to the roots, minimizing evaporation and runoff.
The key to success here is ensuring even distribution. The size and spacing of the holes will depend on your garden’s layout and the water needs of your plants. This system can be buried slightly under mulch to further reduce evaporation and weed growth. It’s an excellent way to automate your watering schedule, but remember to occasionally check for clogs or leaks, especially if using unfiltered water sources.
27. Water in Morning or Evening:
Watering your garden during the cooler parts of the day, either morning or evening, reduces water loss due to evaporation and helps prevent leaf burn. Morning watering allows the foliage to dry out during the day, reducing the risk of fungal diseases, while evening watering can provide moisture through the night when plants are most active in growth.
However, evening watering might increase the chance of fungal issues if the leaves remain wet into the night, so aim for early evening if possible. Adjust your watering based on weather conditions; in hot, dry climates, morning might be better to ensure plants start the day hydrated. Always water at the base of the plants rather than from above to keep foliage dry and direct water where it’s most needed – the roots.
28. Mulch with Grass Clippings:
Grass clippings make an excellent, free mulch that not only retains soil moisture but also adds nutrients back into the soil as they decompose. Spread a layer (about 2 inches) of clippings around your plants, but avoid thick layers that can mat and block air to the soil.
Be cautious with grass treated with herbicides or pesticides; wait a few mowings before using those clippings. Fresh clippings are high in nitrogen, which can burn plants if applied too thickly or if not mixed with other carbon-rich mulch materials like leaves. Over time, this mulch will break down, improving soil structure and fertility, making it a sustainable choice for garden maintenance.
29. Newspaper Weed Barrier:
Using newspaper as a weed barrier is an effective and environmentally friendly method. Lay down several layers of wet newspaper around your plants, then cover with mulch. This blocks light from reaching weed seeds, preventing them from germinating, while the newspaper decomposes, adding organic matter to the soil.
Ensure the ink on the newspaper is soy-based (most modern newspapers are), as this is safe for garden use. This method is particularly useful for new garden beds or around mature plants where weeds often emerge. Over time, as the newspaper decomposes, you’ll need to replenish the mulch, but initially, it significantly reduces your weeding workload.
30. Straw for Potatoes:
Growing potatoes in straw or hay simplifies the harvesting process and helps prevent soil-borne diseases. As potato plants grow, add layers of straw around them, covering the stems and emerging tubers. This practice, known as hilling, encourages more tuber production and keeps them from turning green from sunlight exposure.
When it’s time to harvest, simply move the straw aside to find your potatoes. This method also conserves soil moisture and suppresses weeds. However, ensure the straw is free from seeds to avoid introducing new weeds into your garden. Straw can also harbor pests like slugs, so monitor for signs of damage. This technique not only makes potato growing easier but can also be adapted for other root crops.
31. Reflective Mulches:
Reflective mulches, like aluminum foil or reflective plastic, can be used under other mulch materials to deter pests. The reflection confuses flying insects like aphids, reducing their likelihood of landing on your plants. This can be particularly useful in vegetable gardens where aphids can be a significant problem.
Although the visual effect of having shiny materials in your garden might seem unusual, the benefits can outweigh the aesthetic. Ensure that the reflective material is not directly exposed to plant roots to avoid overheating the soil. It’s best used in combination with other mulches to achieve both pest control and soil health benefits. Remember, this is more of a preventive measure rather than a treatment for an existing infestation.
32. Pine Needles for Acidic Mulch:
Pine needles are an excellent mulch for plants that prefer acidic soil conditions, like azaleas, rhododendrons, and blueberries. They decompose slowly, providing long-lasting mulch that helps retain soil moisture, suppress weeds, and gradually add acidity to the soil as they break down.
When applying pine needles, ensure they’re spread evenly to avoid creating a mat that could repel water. They also create a natural look in the garden, blending well with many landscapes. However, be aware that pine needles can be slightly acidic, so if you’re dealing with already acidic soil, monitor your soil pH to avoid over-acidification. This mulch choice is particularly beneficial for creating microclimates around acid-loving plants.
33. Tin Cans for Seedlings:
Utilizing tin cans as containers for starting seedlings is both practical and sustainable. After removing the label, thoroughly clean the can and punch drainage holes in the bottom. Fill with potting mix, sow your seeds, and once your seedlings are ready, you can plant the entire can into the ground, reducing transplant shock since the roots are not disturbed.
Ensure the cans are free from sharp edges to prevent injury when handling. This method also adds a bit of metal to the soil, which, in small amounts, can be beneficial for some plants. Be mindful of the space they occupy in your garden if you plant many, and remember to remove the cans once the plants are well-established to make room for root expansion.
34. Toilet Paper Rolls:
Toilet paper rolls are an option for starting seedlings. They biodegrade naturally in the soil, which means you can plant the entire roll without disturbing the young roots. Fill each roll with seed starting mix, sow your seeds, and once seedlings are ready, place the roll directly into the ground or a larger pot.
This method encourages vertical root growth as roots can grow down through the roll. However, ensure the rolls are well-moistened before planting to aid decomposition. They also need to be placed closely together in a tray to keep them from falling over when filled with soil. This hack is particularly useful for teaching kids about gardening due to its simplicity and visual appeal.
35. Egg Carton Seed Starters:
Egg cartons are another biodegradable option for seed starting. Cut off the lid, fill each egg compartment with potting soil, and plant your seeds. When it’s time to transplant, cut or tear apart the carton, and plant each section directly into the garden or a larger pot, allowing the paper to decompose.
This method is perfect for small spaces or for starting a lot of seedlings at once. Ensure the carton is from a material that will decompose naturally, like cardboard, not foam. Water carefully, as egg cartons can dry out quickly, and consider poking small drainage holes in the bottom of each compartment if the soil remains too wet. This is an excellent way to reduce waste while starting your garden.
32. Pine Needles for Acidic Mulch:
Pine needles are an excellent mulch for plants that prefer acidic soil conditions, like azaleas, rhododendrons, and blueberries. They decompose slowly, providing long-lasting mulch that helps retain soil moisture, suppress weeds, and gradually add acidity to the soil as they break down.
When applying pine needles, ensure they’re spread evenly to avoid creating a mat that could repel water. They also create a natural look in the garden, blending well with many landscapes. However, be aware that pine needles can be slightly acidic, so if you’re using them around plants that require neutral or alkaline soil, monitor soil pH to avoid adverse effects. Pine needle mulch is also less likely to blow away in windy conditions compared to lighter mulches like straw.
33. Tin Cans for Seedlings:
Using tin cans as pots for seedlings is an eco-friendly way to repurpose waste. Simply clean the cans, poke drainage holes in the bottom, and fill them with potting soil. This method is not only sustainable but also reduces the need for plastic pots. Once the seedlings are ready to be transplanted, you can either remove the seedling carefully or cut the can away if it’s too snug.
Ensure that the edges of the can are smoothed or taped to prevent injury. Also, since metal cans can heat up, they might need to be placed in a shaded area or partially buried in the ground to keep the soil temperature consistent. This hack is perfect for starting seeds indoors or in small spaces where traditional pots might not fit.
34. Toilet Paper Rolls:
Toilet paper or paper towel rolls are biodegradable and can be used as seed starters. Fill them with soil, plant your seeds, and when it’s time to transplant, the whole roll can go into the ground, reducing root disturbance. This is particularly useful for plants like tomatoes or peppers that don’t like their roots disturbed.
One consideration is ensuring the rolls are firmly packed with soil to prevent them from collapsing. Also, they dry out quickly, so keep an eye on moisture levels. This method is not only cost-effective but also adds organic matter to the soil as the paper decomposes, although it’s not suitable for seeds that need a longer germination period due to the rolls’ rapid breakdown.
35. Egg Carton Seed Starters:
Egg cartons offer another biodegradable option for starting seeds. Simply fill each compartment with soil, sow your seeds, and once seedlings are established, cut the carton into individual sections or plant the whole compartment directly into the soil. The cardboard will decompose, adding to soil health.
This approach is space-efficient and perfect for small-scale gardening. However, like toilet paper rolls, egg cartons dry out quickly, so regular watering is crucial. Also, make sure the carton is well-supported or placed in a tray to catch water, as it can become quite flimsy when wet. This method encourages kids’ participation in gardening due to its simplicity and the fun of watching seeds sprout in everyday household items.
36. Old Shoes as Planters:
Turning old shoes into planters adds a whimsical touch to any garden. Drill drainage holes in the soles for water escape, fill with soil, and plant your choice of small plants or herbs. This not only recycles what would be waste but also creates a conversation piece in your garden.
Choose shoes with some depth to give roots room to grow, and consider the material; leather might decompose faster than synthetic materials. Also, ensure the shoes are positioned in a way that doesn’t trap water, causing root rot. This hack is more for aesthetic or educational purposes, particularly appealing in children’s gardens or for themed garden areas.
37. Reuse Gutters for Herbs:
Mounting old gutters on a sunny wall or fence can create a unique herb garden. Fill the gutters with soil, drill holes for drainage, and plant herbs that don’t require deep root systems. This vertical arrangement saves space and can be both functional and decorative.
Make sure the gutters are securely attached, as they’ll get heavy when filled with soil and water. Also, consider the orientation to ensure all plants get enough light, and plan for easy access for watering and harvesting. This method is ideal for urban gardeners or anyone looking to grow herbs in an unconventional manner that also maximizes space.
34. Toilet Paper Rolls:
Toilet paper or paper towel rolls are biodegradable and can be used as seed starters. Fill them with soil, plant your seeds, and when it’s time to transplant, the whole roll can go into the ground, reducing root disturbance. This is particularly useful for plants with delicate roots like tomatoes or peppers.
To make them stand upright, you might need to place them in a tray or another container, possibly with the bottom folded up to create a base. Ensure they’re kept moist, as the paper can dry out quickly. Over time, the cardboard will decompose, enriching the soil with organic matter. This method is especially engaging for kids, teaching them about recycling and gardening simultaneously.
35. Egg Carton Seed Starters:
Egg cartons offer a simple, eco-friendly way to start seeds. Cut off the lid, fill each compartment with potting soil, and plant your seeds. When seedlings are ready, cut or separate the compartments and plant them directly into your garden or larger pots. The cardboard will decompose, providing nutrients to the soil.
Since egg cartons are shallow, they’re ideal for starting seeds rather than growing plants to maturity. Ensure good drainage by poking small holes in the bottom of each compartment if they don’t naturally drain. This method is perfect for small seeds and works well for educational gardening projects due to its visual and tactile appeal.
36. Old Shoes as Planters:
Repurposing old shoes into planters adds a whimsical touch to your garden while recycling materials. Ensure there’s good drainage by making holes in the sole or sides. Fill with soil and plant small herbs or flowers. This is particularly fun for children’s gardens or as quirky garden decor.
Consider the material of the shoe; leather might decompose faster than synthetic materials. Also, think about the plant’s needs; shoes are small, so they’re best for plants that don’t require much root space. They can become a conversation piece in your garden but remember, they’ll need frequent watering due to their small size and potential for rapid drying.
37. Reuse Gutters for Herbs:
Old gutters can be transformed into a vertical herb garden, perfect for small spaces or urban gardening. Attach them to a sunny wall or fence, fill with a lightweight potting mix, and plant your herbs. This setup not only saves space but also makes harvesting easy since everything is at eye level.
Ensure the gutters are securely mounted to handle the weight of soil and plants when watered. You might need to drill additional holes for drainage if they’re not already there. This method can be expanded by stacking gutters vertically, creating layers of different herbs, but always consider the structural support required as the system grows.
38. Lemon Rinds:
Lemon rinds can serve as biodegradable pots for seedlings, adding a touch of citrus to your gardening. After using the lemon, hollow out the rind, fill with soil, and plant seeds. They not only act as a pot but can also deter some pests with their scent.
Lemon rinds decompose quickly, so they’re more suited for very young seedlings rather than long-term growth. They also add a bit of acidity to the soil around them as they break down, which can be beneficial for certain plants like tomatoes. However, they’re small, so you’ll need many for a significant seed starting operation, making this more of a fun, educational project than a practical solution for large-scale gardening.
39. Cork Labels:
Using wine corks as plant labels is both practical and aesthetically pleasing. Simply write on the cork with a permanent marker, and stick it into the soil next to your plants. This method is durable, waterproof, and adds a touch of charm to your garden.
Corks can fade over time under direct sunlight, so you might need to refresh the writing periodically. Also, ensure the corks are pushed into the soil just far enough to be stable but not so deep as to lose visibility. This hack is perfect for gardeners who enjoy a bit of flair in their garden organization and want to reuse materials in creative ways.
40. Old CDs:
Hanging old CDs around your garden can deter birds from eating your crops due to the reflective light and the slight noise they make when they move in the wind. Suspend them from strings or wire around your garden, particularly over seedlings or fruit trees.
While this can be effective in small areas or for short periods, birds can become accustomed to the sight over time, reducing its effectiveness. Also, consider placement to avoid creating a glare that might be bothersome to neighbors or yourself. This method is more about visual deterrence and can add a bit of sparkle to your garden, but it should be part of a broader pest management strategy.
41. Bottle Towers:
Creating vertical gardens with plastic bottles is an innovative way to grow in small spaces. Cut off the bottom of each bottle, drill holes for drainage, and stack them, securing with wire or string. Fill with soil and plant your choice of small plants or herbs in each bottle section.
This structure can get quite heavy when full, so ensure it’s well-supported. Watering can be challenging; you’ll need to water each level, or consider a drip system if constructing many towers. This method not only recycles plastic but also maximizes growing space vertically, making it ideal for balcony or urban gardening. However, the longevity of the structure depends on the UV resistance of the plastic, as prolonged sun exposure can degrade it.
42. Tea Leaves:
Tea leaves, whether from used tea bags or loose leaves, can be added to compost or used directly as mulch or soil amendment. They’re rich in nitrogen, which helps promote green, leafy growth in plants. Spread them around the base of plants or mix into the top layer of soil.
Be cautious about the type of tea; avoid those with added flavors or artificial ingredients. Tea leaves also tend to be acidic, so they’re particularly good for plants like azaleas, ferns, or blueberries that thrive in acidic soil. Over time, as they decompose, they’ll improve soil structure, but they should be part of a balanced soil amendment strategy, not the sole contributor.
43. Chamomile Tea for Seedlings:
Chamomile tea has natural antifungal properties that can help prevent damping off, a common issue with young seedlings. Water seedlings with cooled chamomile tea instead of plain water to give them a fungal protection boost.
It’s essential to cool the tea to room temperature before use to avoid shocking the young plants with hot water. This method is particularly useful in damp, cool conditions where fungal diseases are more likely. However, it’s not a cure-all; proper spacing, air circulation, and not overwatering are still crucial for healthy seedlings.
44. Cinnamon for Rooting:
Cinnamon can be used to promote rooting in plant cuttings and prevent fungal infections at the cut site. Simply dip the end of your cutting in cinnamon before planting it in soil or water.
The antimicrobial properties of cinnamon help to seal the cut and encourage root growth. However, it’s not a substitute for good cutting practices like using clean tools and providing the right environment for rooting (humidity, light, etc.). This hack is an additional measure to enhance success rates in propagation but should be combined with other sound gardening practices.
A simple solution of dish soap mixed with water can be an effective way to combat aphids and other soft-bodied pests. Mix about a teaspoon of mild liquid soap per gallon of water, spray directly onto the affected areas of the plants. The soap breaks down the insects’ exoskeletons, leading to dehydration and death.
Be cautious with this method as soap can also harm beneficial insects if not applied judiciously. Always test on a small part of the plant first to ensure it doesn’t damage the foliage. Also, avoid using soaps with degreasers or antibacterial agents, which can be too harsh for plants. This solution should be used as a spot treatment, and plants should be rinsed off after a few hours to prevent potential leaf burn.
46. Oatmeal Water:
Soaking oats in water overnight creates a nutrient-rich liquid that can be used to water your plants. Oats release minerals like silica, which can strengthen plant cell walls, and other nutrients like iron and manganese. Strain the oats and use the water to hydrate your plants, especially those in need of a nutrient boost.
This method is more about providing micronutrients rather than major nutritional elements like nitrogen, phosphorus, or potassium. It can be particularly useful for plants showing signs of mineral deficiencies. However, don’t rely solely on this; it should complement a balanced fertilization strategy. Also, ensure the oats aren’t flavored or sweetened, as these additives could harm plants.
47. Seaweed as Fertilizer:
Seaweed is a powerhouse of nutrients for plants, including trace elements like iron, zinc, and magnesium. You can either use dried seaweed as mulch or make a liquid fertilizer by soaking seaweed in water for a few weeks, then dilute this “seaweed tea” for watering plants.
If using fresh seaweed, rinse it first to remove salt, especially if you live inland, as salt can harm soil and plants. Seaweed breaks down slowly, providing a long-term nutrient release. It’s also known to stimulate plant growth hormones, leading to healthier growth. However, be mindful of where you source your seaweed to avoid introducing invasive species or pollutants into your garden.
48. Wood Ash for Alkaline Soil:
Wood ash from untreated wood can be used to raise the pH of acidic soils, providing potassium and calcium. Sprinkle it lightly around plants that prefer alkaline conditions like cabbages, broccoli, or beets.
Use wood ash sparingly and test your soil pH first, as too much can make the soil too alkaline, locking out other nutrients. Avoid using ash from treated or painted wood, as it might contain harmful chemicals. This method is beneficial but requires careful application to not upset the soil’s nutrient balance. It’s also best used in the fall or winter to allow time for soil integration before spring planting.
49. Vinegar for Acid-Loving Plants:
Diluting white vinegar with water (about 1 tablespoon per gallon) can help lower soil pH for plants that thrive in acidic conditions like azaleas, rhododendrons, or blueberries. Use this solution to water the plants or spray around their base.
However, vinegar is potent, and frequent use can harm plants or soil if not managed carefully. It should be more of a one-time adjustment rather than a regular treatment. Always monitor soil pH after application to prevent over-acidification. This hack is handy for gardeners dealing with overly alkaline soil but requires moderation and soil testing for safety.
50. Painted Rocks:
Painting rocks in bright, contrasting colors can deter birds from pecking at your seedlings or newly planted seeds. Place these rocks around your garden beds, especially where you’ve just sown seeds or planted out young plants.
This method relies on visual deterrence, and its effectiveness can wane as birds get used to the rocks. It’s also more effective for small areas or specific plants rather than an entire garden. Additionally, ensure that the paint used is non-toxic if you’re concerned about environmental impact. This hack adds a creative, decorative element to your garden while serving a practical purpose.
51. Fabric Pots:
Fabric pots, or grow bags, are made from breathable materials allowing for air pruning of roots, which leads to healthier, more robust root systems. When roots reach the fabric, they’re exposed to air, causing the tips to dry out and encouraging new growth from the root’s main body.
These pots promote better drainage and aeration than traditional plastic pots, reducing the risk of root rot. However, they can dry out quickly, so frequent watering might be necessary, especially in warm conditions. They’re also less durable than hard pots, so they might not last as long, but their benefits to plant health can outweigh this if managed correctly.
52. Window Screening:
Old window screens can be repurposed to protect seedlings from birds or pests while still allowing light, air, and water through. Cut the screen to fit over seed trays or young plant beds, securing it with stakes or weights.
This method is particularly useful for seedlings that are vulnerable to bird damage but need exposure to elements for growth. Ensure the screen isn’t too tight to avoid damaging emerging plants. While effective, remember that screens will need periodic cleaning to maintain light penetration and might need replacing if they become too damaged or clogged.
53. Nylon Stockings:
Cut strips of old nylon stockings to use as plant ties for supporting vining plants or securing branches. Nylon is gentle on plant stems, provides good support, and is reusable.
When using nylon, avoid tying too tightly to prevent cutting into the plant as it grows. They’re particularly handy for plants like tomatoes where you might need to adjust ties as the plant grows. The material stretches, accommodating plant growth, but over time, it can degrade under sunlight, so keep an eye on its condition.
54. Shower Curtain Liners:
Old shower curtain liners can be transformed into mini greenhouses for seedlings. Simply drape the liner over pots or trays, securing it with rocks or clips to keep moisture in and warmth around, aiding in germination.
This method creates a humid environment, ideal for seed starting, but be cautious not to overdo it, as too much humidity can lead to fungal issues. Ensure there’s some ventilation to prevent overheating on sunny days. The liners are typically disposable, so this hack also provides a way to repurpose what would otherwise be waste.
55. Use Old Ladders:
Lean old or decorative ladders against walls or fences to support climbing plants. This not only recycles an item that might otherwise go to waste but also adds a rustic, vertical element to your garden design.
Make sure the ladder is stable and secure, as it will bear the weight of growing plants. Consider the sunlight exposure for both the plants and the ladder’s integrity over time. This method is visually appealing and practical for space-saving, but regular maintenance might be needed to ensure safety and functionality.
56. Reuse Fish Tank Water:
Water from fish tanks is rich in nutrients due to fish waste, making it an excellent, natural fertilizer for plants. Use it to water your garden plants, but dilute it if you’re unsure of its concentration or if you’re dealing with sensitive plants.
While this water can boost plant growth, it’s crucial to use it judiciously. High levels of ammonia or nitrates could harm plants if not balanced. Also, ensure the water doesn’t contain any chemicals harmful to plants, like medications used in the tank. This method is a win-win for both aquarium and garden maintenance, reducing water waste.
57. Gravel in Pot Bottoms:
Adding a layer of gravel at the bottom of pots helps with drainage, preventing water from sitting at the base and causing root rot. This is particularly beneficial for plants that are sensitive to overwatering or in environments where excess moisture is a concern.
However, this practice has been debated; some argue it can create a perched water table, where water doesn’t drain freely from the soil above into the gravel below. If using this method, ensure your pot has adequate drainage holes, and consider using a screen or landscape fabric over the gravel to avoid soil washing through.
58. Moss as Natural Humidity:
Using moss on top of the soil can help retain moisture, especially for plants that require high humidity like ferns or tropical varieties. Moss acts as a natural sponge, absorbing and slowly releasing water.
While moss can help with humidity, it needs to be kept moist itself, or it will dry out and lose its benefits. It’s also crucial to use moss that’s free from pests. This hack is more suited for indoor.
59. Leaf Mold:
Leaf mold is essentially composted leaves, offering a rich, dark compost full of beneficial microorganisms that improve soil structure, increase moisture retention, and provide a slow-release source of nutrients. Collect leaves in the fall, pile them up, and let nature do its work over a year or more.
The process requires patience as leaves decompose slowly, but the result is a fantastic soil conditioner. You can speed up decomposition by shredding leaves or turning the pile occasionally. Leaf mold is particularly beneficial for sandy soils to increase their water-holding capacity and for heavy clay soils to improve aeration. Avoid using leaves from diseased trees to prevent spreading pathogens.
60. Corn Gluten Meal:
Corn gluten meal acts as a natural pre-emergent weed control by inhibiting weed seed germination while also providing nitrogen to your plants. Apply it early in the spring before weed seeds have a chance to sprout, and it will feed your existing plants as it breaks down.
Timing is critical with corn gluten meal; if applied too late, it won’t prevent weed seeds from germinating. Also, it’s not effective on established weeds, so combine it with other weed management strategies. Remember, while it’s considered organic, it’s still a concentrated form of nitrogen, so use according to soil test recommendations to avoid over-fertilization.
61. Egg Cartons for Worm Composting:
For those with limited space or looking to start small with vermicomposting (worm composting), egg cartons can be used to house worms. Fill the cartons with bedding material like shredded newspaper, add some food scraps, and introduce worms.
This method is ideal for educational purposes or in environments like apartments where space is at a premium. However, it’s a small-scale solution. You’ll need to manage moisture, ensuring it’s damp but not wet, and avoid overfeeding the worms. As the worms process the waste, you can harvest the nutrient-rich castings for your plants, but remember, this setup will need to be expanded or combined with a larger compost system for significant gardening needs.
62. Plant Near Structures:
Planting near walls, fences, or buildings can provide additional warmth and shelter for your plants, extending the growing season for heat-loving plants like tomatoes or peppers in cooler climates. This microclimate can also be beneficial for frost-sensitive plants.
However, be mindful of the shadow cast by structures, ensuring your plants still receive adequate light. Also, consider air circulation; too close to a structure might trap moisture, leading to disease. This technique can also save space by utilizing vertical gardening methods, but always check the exposure to ensure it’s beneficial rather than detrimental to plant health.
63. Save Seeds:
Saving seeds from your garden not only saves money but also helps maintain heirloom varieties and promotes biodiversity. Learn which plants are good candidates for seed saving (open-pollinated, not hybrid), and harvest seeds when they’re mature but before they drop or are damaged by weather.
Seed saving requires understanding basic genetics to avoid cross-pollination if purity is a concern. Proper drying, cleaning, and storage are crucial to ensure seed viability for the next season. This practice can be incredibly rewarding, connecting you more deeply with the cycle of plant life, but it’s a skill that develops with practice and observation over time.
64. Soil Testing:
Regular soil testing helps you understand your garden’s pH, nutrient levels, and potential deficiencies or excesses. This knowledge allows you to tailor your soil amendments, reducing waste and ensuring your plants get exactly what they need for optimal growth.
Soil tests can be done through kits or by sending samples to a lab for more detailed analysis. Based on the results, you might adjust your composting, fertilization, or lime application practices. Remember, soil conditions can change year to year due to weather, plant uptake, and amendments, so testing every few years or when you notice plant health issues is advisable.
65. Plant in Layers:
Mimicking nature by planting in layers (tall trees, shrubs, perennials, and ground covers) can create a more balanced, self-sustaining ecosystem in your garden. This “forest gardening” approach maximizes space, light, and soil use, supporting biodiversity and reducing maintenance.
Each layer has different light and water needs, so planning is key. The canopy layer might provide shade for the understory, reducing water loss and weed growth. This method can also help with pest control, as diverse plantings attract beneficial insects, but it requires understanding how plants grow together in a natural setting to avoid competition or shading out.
66. Hose Ends:
Watering at the base of plants rather than overhead reduces the risk of fungal diseases by keeping foliage dry. Using a hose with a nozzle designed for this purpose or simply directing water at soil level ensures that moisture goes directly to the roots where it’s needed.
This method conserves water by minimizing evaporation and runoff. However, ensure you’re not washing away mulch or soil, which can expose roots or lead to erosion. In larger gardens, drip systems might be more efficient, but for spot watering or smaller areas, this technique can be very effective.
67. Old Pipes for Irrigation:
Repurpose old PVC pipes or even metal ones by drilling small holes along their length to create a simple drip irrigation system. Lay the pipes along rows or around plants, connect to a water source, and water will seep out slowly, delivering moisture directly to plant roots.
This system can be particularly useful in conserving water, especially in hot climates or for containers where water tends to drain quickly. However, ensure the holes are small and evenly spaced to prevent over-watering in one spot. Regular maintenance to check for clogs or leaks is essential for long-term use. This method not only recycles materials but also promotes water efficiency in gardening.
Conclusion
As we conclude our exploration of these 67 gardening hacks, it’s clear that gardening is as much about innovation as it is about cultivation. By incorporating these tips into your gardening routine, you’re not just growing plants; you’re fostering a deeper connection with nature, reducing waste, and potentially saving money.
Remember, gardening is an ongoing learning experience; each season brings new challenges and opportunities.
Whether you’re composting with kitchen scraps, combating pests with natural remedies, or optimizing space with vertical gardens, the journey of gardening is one of continuous growth and discovery. So keep experimenting, keep learning, and most importantly, enjoy the fruits (and vegetables!) of your labor. Here’s to a greener, more sustainable, and bountiful garden!